|
Title |
Description | Has new content | ||||||||||||||||||||
|---|---|---|---|---|---|---|---|---|---|---|---|---|---|---|---|---|---|---|---|---|---|---|
| Tinkercad Tutorials |
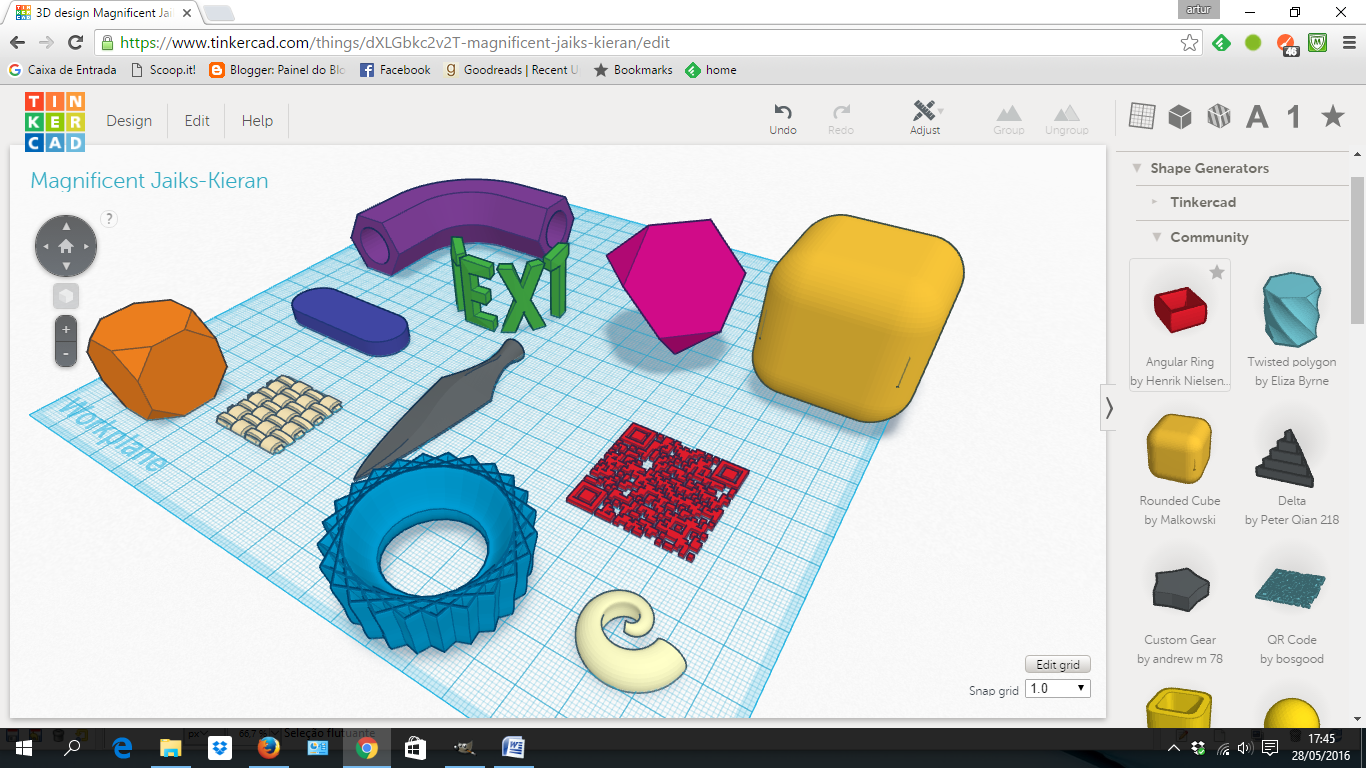
I've been working on a series of short Tinkercad tutorials, for my students and teacher training workhops. Tinkercad is a full-fledged primitive modeler that works in any WebGL enabled browser. It's simple, easy to use, and I'm loving it because it generates STL files for 3D printing that are generally error-free (and anyone who works with 3D printers know how important it is to have correct meshes to print). This first series is about Tinkercad's user interface, tools and workflow: Scribd Collection: Tinkercad Tutorials GDrive Folder: Tinkercad Tutorials Have fun! And Tinkercad also generates VRML files ;) ... so, enjoy! |
|||||||||||||||||||||
| Tinkerplay |
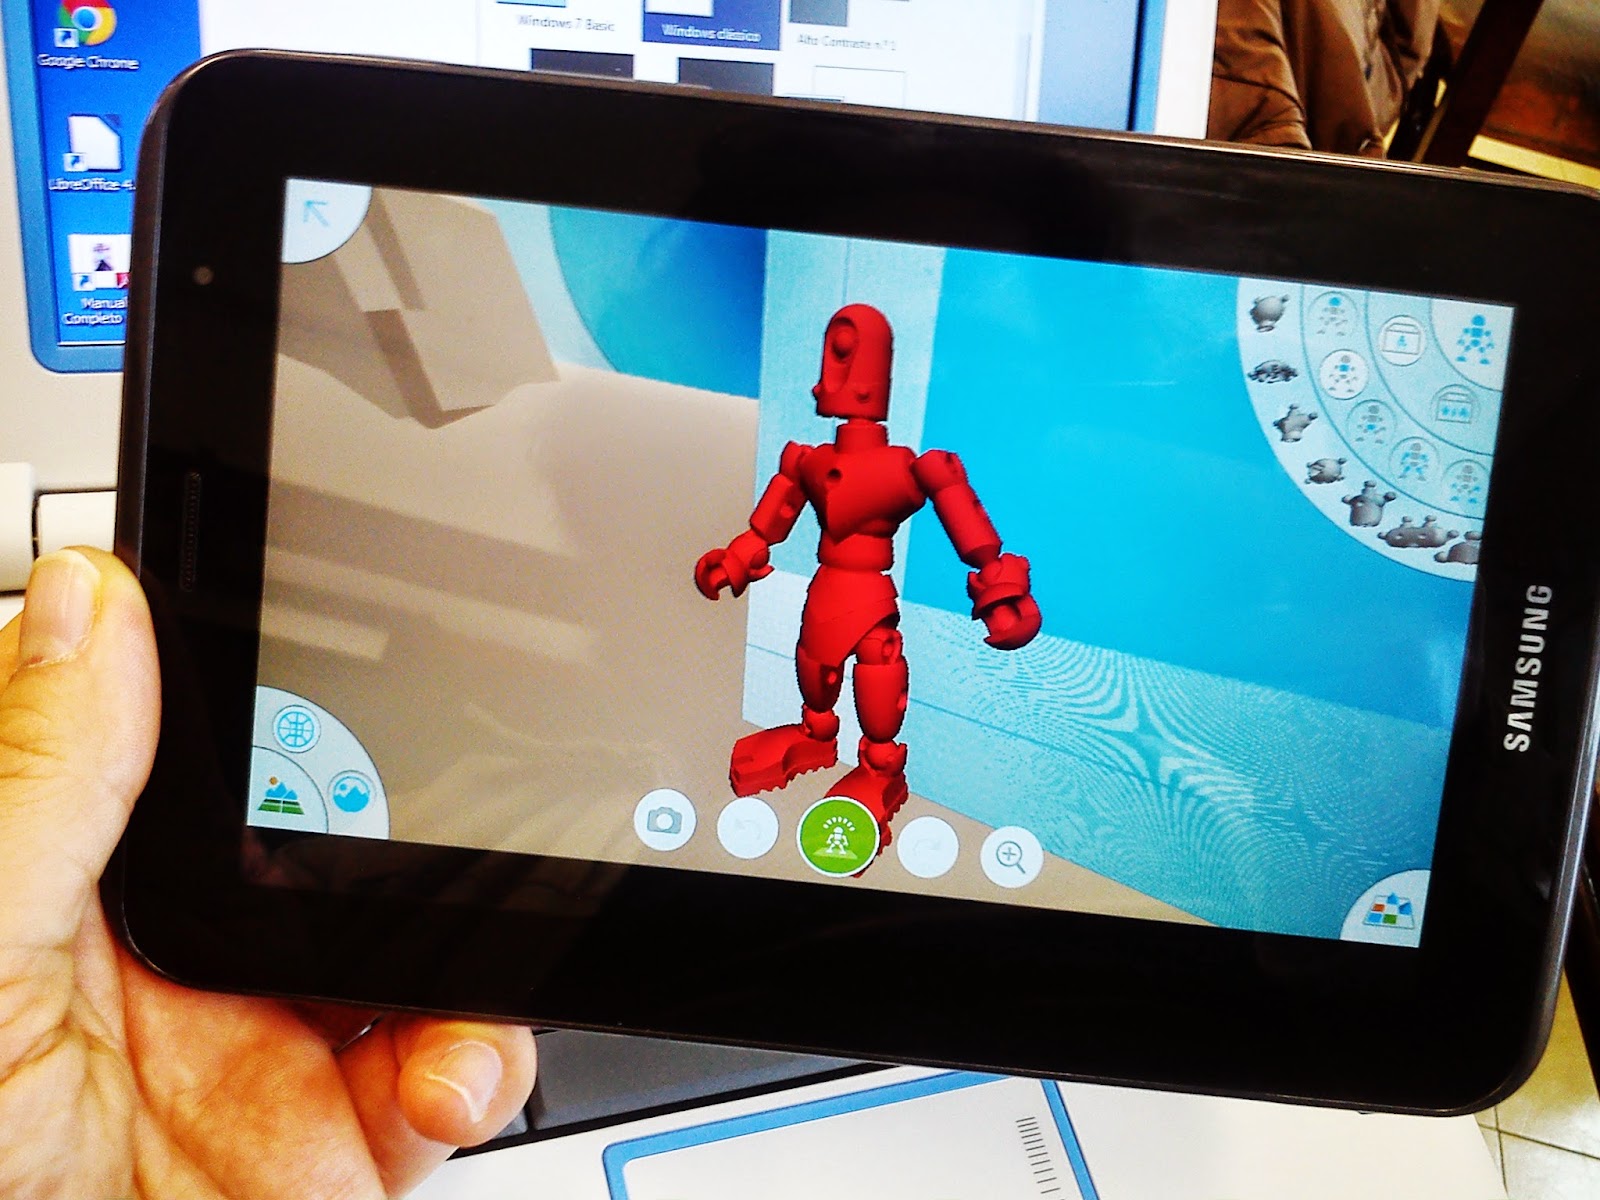 Às voltas com o divertido Tinkerplay da Autodesk, uma app que permite criar combinações fantásticas a partir de uma biblioteca de peças. Um pouco como o Doga Project, mas pensado de raiz para tablets. Para os meus dedos e mente mais habituada a interfaces clássicos criar no Tinkerplay tem o seu quê de difícil, mas para as crianças já calejadas pelos interfaces de toque em 3D suspeito que lhes seja muito fácil. Aliás, já desafiei um aluno ou dois e estão a adorar...  Com o Tinkerplay criam-se personagens a partir de bibliotecas de peças. A diferença em relação a outros legos digitais é que as peças estão pensadas para se articularem entre si. O objecto final não é estático e pode ser movido. O conceito do projecto é repensar os brinquedos para o século XXI, estimulando as crianças a criar os seus próprios brinquedos. Dentro da app pode-se construir, posicionar, fotografar e exportar.  Ao contrário de outros programas o resultado final não é um objecto único. O Tinkerplay gera ficheiros STL prontos a imprimir para cada peça que compõe o personagem. Tirá-los do tablet pode ser feito através de partilha em Dropbox, email, ou gravar localmente e depois copiar para um computador. Apesar da app gerar meshes limpas, convém retocar no netfabb para minimizar possíveis problemas de impressão.  Cá está, um robot concebido no tablet, montado após a impressão das peças na bee. Suspeito que os meus alunos irão gostar disto. |
|||||||||||||||||||||
| Tip - Realistic textures in Blender and Unity |
Some tutorials by example to implement realistic textures in Blender: https://www.youtube.com/watch?v=W07H7xeUnGE https://www.youtube.com/watch?v=9PJL0eAuZ_E I’d used this texture from http://www.cgtextures.com/: And the http://www.crazybump.com/ to generate the normal and oclusion map:
You can use the Unity tools for using the Normal and Occlusion Map, just drag the images NRM/OCC to the variable Normal/Occlusion map residing in the desired material object, in this case the wall of the house:
Before:
After:
Before:
After:
Júlio Vale
|
|||||||||||||||||||||
| Tip: Como enviar uma mensagem ao Administrador da BabelX3D |
Para enviar uma mensagem a partir do serviço de mensagens internas dirigida ao Administrador deste portal, faça o seguinte:
|
|||||||||||||||||||||
| Tip: Como inserir um vídeo numa publicação da BabelX3d de forma simples |
É possível inserir um vídeo numa publicação na BabelX3d de forma muito simples: basta colocar o endereço (URL) na caixa “Vídeo” que surge na parte inferior do corpo da publicação. Presentemente são suportados vídeos Brightcove, Facebook, Youtube e Vimeo. O seguinte vídeo foi colocado recorrendo a esta funcionalidade: |
|||||||||||||||||||||
| Tip: How to reduce the Project size in Unity3D |
Hi all, The good practice recommends that a project should contain only the scenes related to it. Creators sometimes disregard this rule because they want to reuse the assets installed in other scenes, or for other reasons. After some time this continued practice may inflate the project beyond a reasonable size and some difficulties may occur when, for instance, we need to share it with someone else, even a specific scene since the project file is huge. The question is: how can we share only that specific scene and the sources/assets related without sharing the entire project? "HINT: When exporting a package Unity can export all dependencies as well. So, for example, if you select a Scene and export a package with all dependencies, then Unity exports all Models, Textures and other Assets that appear in the Scene as well." Unity Manual, 2019
Get all details on Unity manual: ⇒An informative discussion about this: https://forum.unity.com/threads/export-package-only-current-scene-not-entire-project.383538/ Cheers! vcard |
|||||||||||||||||||||
| Tip: open images in a fancy Colorbox overlay |
Give a nice touch to your images with Colorbox, a plugin installed here on BabelX3D portal platform. Example 1: a link that pops an image:
Example 2: an image that enlarges to show more detail:
How is this done? It's is done in the "Advanced" tab of the link form (do not confuse it with the "image form"), by adding "colorbox-load" to "CSS class" field. Simply that, nothing else is necessary. Get more details here: Enjoy! vcard |
|||||||||||||||||||||
| Tip: Unity 3D "build" optimization |
Hello everyone, After "build", check this file to determine which objects are not optimized, they are usually the textures that increase the size of the "build" files: %
My workcase: Textures 82.2 mb 84.1% Meshes 2.9 mb 2.9% Animations 1.3 mb 1.4% Sounds 0.4 kb 0.0% Shaders 2.8 mb 2.9% Other Assets 3.7 mb 3.8% Levels 97.5 kb 0.1% Scripts 471.4 kb 0.5% Included DLLs 4.1 mb 4.2% File headers 52.4 kb 0.1% Complete size 97.6 mb 100.0%
Used Assets, sorted by uncompressed size: 10.7 mb 10.9% Assets/Standard Assets/Characters/ThirdPersonCharacter/Textures/EthanOcclusion.png 10.7 mb 10.9% Assets/Standard Assets/Characters/ThirdPersonCharacter/Textures/EthanNormals.png 6.6 mb 6.8% Assets/_AssetStore/Medieval Environment/Terrain/Terrain1.asset 5.3 mb 5.5% Assets/_AssetStore/Medieval Environment/Textures/Concrete1_diff.tga 5.3 mb 5.5% Assets/_AssetStore/Medieval Environment/Textures/Stone1_diff.tga 5.3 mb 5.5% Assets/_AssetStore/Medieval Environment/Textures/Ground1_diff.tga 2.7 mb 2.7% Assets/_AssetStore/Medieval Environment/Textures/Ground1_nm.tga 2.7 mb 2.7% Assets/_AssetStore/Medieval Environment/Textures/Concrete1_nm.tga 2.7 mb 2.7% Assets/_AssetStore/Classic Skybox/02/sky2_UP.jpg 2.7 mb 2.7% Assets/_AssetStore/Classic Skybox/02/sky2_RT.jpg 2.7 mb 2.7% Assets/_AssetStore/Classic Skybox/02/sky2_LF.jpg 2.7 mb 2.7% Assets/_AssetStore/Classic Skybox/02/sky2_FR.jpg 2.7 mb 2.7% Assets/_AssetStore/Classic Skybox/02/sky2_DN.jpg 2.7 mb 2.7% Assets/_AssetStore/Classic Skybox/02/sky2_BK.jpg 2.6 mb 2.7% Resources/unity_builtin_extra 2.4 mb 2.4% Assets/New Terrain 2.asset 1.3 mb 1.4% Assets/_Julio/char_cyberKid_dff.tif 1.3 mb 1.4% Assets/_AssetStore/Medieval Environment/Textures/Grass1_diff.tga 1.3 mb 1.4% Assets/_AssetStore/Medieval Environment/Textures/Cliff1_diff.tga 1.0 mb 1.0% Assets/_AssetStore/Medieval Environment/Standard Assets/Skyboxes/Textures/Sunny2/Sunny2_up.tif 1.0 mb 1.0% Assets/_AssetStore/Medieval Environment/Standard Assets/Skyboxes/Textures/Sunny2/Sunny2_right.tif 1.0 mb 1.0% Assets/_AssetStore/Medieval Environment/Standard Assets/Skyboxes/Textures/Sunny2/Sunny2_left.tif 1.0 mb 1.0% Assets/_AssetStore/Medieval Environment/Standard Assets/Skyboxes/Textures/Sunny2/Sunny2_front.tif 1.0 mb 1.0% Assets/_AssetStore/Medieval Environment/Standard Assets/Skyboxes/Textures/Sunny2/Sunny2_back.tif 867.6 kb 0.9% Assets/Standard Assets/Characters/ThirdPersonCharacter/Models/Ethan.fbx 682.8 kb 0.7% Assets/_AssetStore/Terrain Assets/Trees Ambient-Occlusion/Textures/ScotsPinebranches.psd 682.8 kb 0.7% Assets/_AssetStore/Terrain Assets/Trees Ambient-Occlusion/Textures/SycamoreLeaves5.psd 682.8 kb 0.7% Assets/_Blender/CasaDaVinci/WoodRough0084_1_M.jpg 682.8 kb 0.7% Assets/_Vivaty/SwingBridge/Texturas/hillstone.jpg 682.8 kb 0.7% Assets/_AssetStore/Medieval Environment/Textures/Grass1_nm.tga 682.8 kb 0.7% Assets/_AssetStore/Medieval Environment/Textures/Cliff1_nm.tga
References: http://docs.unity3d.com/Manual/webgl-building.html http://docs.unity3d.com/Manual/ReducingFilesize.html
Júlio Vale |
|||||||||||||||||||||
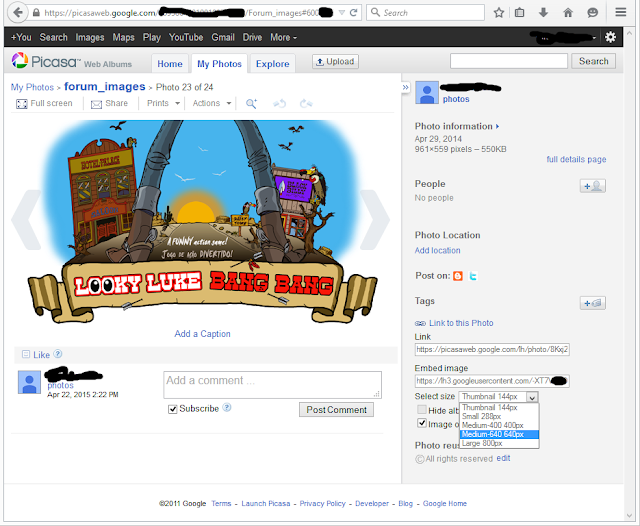
| Tip: use Picasa web to store your forum images |
Hi All, Babelx3d forum like many other forums does not allow you to upload files (images included) but you can illustrate your posts with images if you use images stored in your own web site or in another web place. I have used different ways over the years and now I find PicasaWeb the most practical. (update: Picasa is now Google Photos)
There you can easily storage images (even by drag and drop), organize them, and get the web links to embed in the posts (or anywhere). You also have options to post images in different sizes or organized in a slideshow.
There is a Picasa app to install in your PC but I do not like it and don't recommend installing. Enjoy! vcard |
|||||||||||||||||||||
| Tip: video embedded in a forum message |
Hi All As you see embedding video or other similar object can be done here too. This is done in the same way we do it in other systems by pasting the embed code we got from the site/server that provides the content (Ex: youtube or any other):
The steps to do it are:
A simpler way to add video in messages is explained on another support message. Enjoy, vcard |